Table of Contents
Introduction
Welcome to the world of convenient and healthy cooking with your new air fryer! If you’ve recently acquired this innovative kitchen appliance and are eager to explore its potential, you’re in the right place. In this guide, we will take you through the process of using your air fryer for the first time, ensuring a seamless experience. Get ready to enjoy delicious, crispy meals with less oil and more flavor!

Unboxing and Initial Setup
I. Unpack and Inspect Your Air Fryer
A. Begin the Unpacking Process
Start by carefully unpacking your newly acquired air fryer. Lay out all components in an organized manner to ensure nothing is missing.
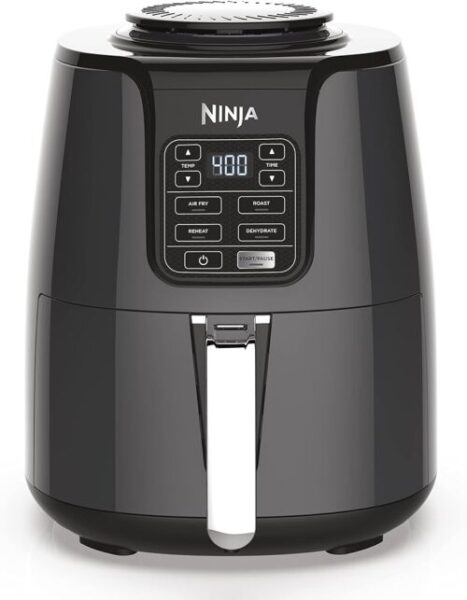
B. Identify Key Components
Most air fryers typically include a basket, a removable tray, and various adjustable settings. Take a moment to identify and acquaint yourself with each component. Refer to the user manual for a detailed description.
C. Check for Any Damages or Missing Parts
Thoroughly inspect each component for damages. Check the basket, tray, and any accessories for cracks, dents, or defects. Additionally, ensure that all the necessary parts mentioned in the manual are present.
D. Ensure Proper Functionality
Test the functionality of adjustable settings. Ensure that buttons or dials are responsive and operate smoothly. This step is essential to identify any manufacturing issues before the first use.
II. Clean Removable Parts for Optimal Performance
A. Gather Cleaning Supplies
Before diving into the cleaning process, gather warm water, mild dish soap, and a soft sponge or cloth. These items will help you clean the removable parts effectively.
B. Disassemble the Components
Carefully disassemble the removable parts such as the basket and tray. Follow the instructions in the user manual to avoid any damage during disassembly.
C. Clean with Warm, Soapy Water
Using a soft sponge or cloth, clean each part with warm, soapy water. Pay special attention to areas that may have come into contact with manufacturing residues during production.
D. Rinse Thoroughly
After cleaning, rinse each part thoroughly to ensure that no soap residue remains. This step is crucial to prevent any unwanted flavors or odors from transferring to your food during the cooking process.
E. Allow Parts to Air Dry
Once rinsed, allow the components to air dry completely. Avoid using a towel to dry them, as this can leave behind lint or fibers.
F. Reassemble the Components
After ensuring that all parts are dry, reassemble the components according to the user manual. Take your time to ensure a proper fit, as this ensures optimal performance during cooking.
III. Additional Tips for Setup
A. Choose a Suitable Location
Select a flat, stable surface for your air fryer. Ensure that there is sufficient space around the appliance for proper ventilation.
B. Connect to Power
Before using your air fryer, connect it to a power source according to the manufacturer’s instructions. Ensure that the power cord is in good condition and that the plug fits securely into the outlet.
C. Familiarize Yourself with Controls
Take a moment to familiarize yourself with the controls on your air fryer. Understand the functions of each button or dial and refer to the user manual for specific details.
By following these steps, you’ll not only set up your air fryer correctly but also ensure that it operates efficiently, providing you with a hassle-free cooking experience.
Preheating Your Air Fryer
1. Importance of Preheating
A. Even Cooking Results
Preheating your air fryer is a crucial step in achieving consistent and even cooking results. It allows the appliance to reach the designated cooking temperature before placing the food inside, ensuring that each part of the dish cooks uniformly.
B. Optimal Crispiness
Preheating plays a key role in achieving the desired crispiness for air-fried foods. The initial blast of hot air that comes from a preheated air fryer contributes to the exterior crispiness of the food, creating a satisfying texture that is difficult to achieve without preheating.
C. Reduced Cooking Time
By preheating the air fryer, you reduce the overall cooking time needed for your food. This is particularly important for recipes with specific time requirements, and it helps in getting your meals on the table more efficiently.
2. Preheat Setting
A. Availability in Most Air Fryers
Many modern air fryers come equipped with a designated preheat setting, simplifying the preheating process for users. This feature streamlines the preheating task, making it easy for individuals to ensure their appliance reaches the ideal temperature before cooking.
B. Following Appliance Instructions
To initiate the preheating process, it’s essential to follow the specific instructions provided by the manufacturer of your air fryer. These instructions may include pressing a preheat button or setting the appliance to a certain temperature for a specified duration.
C. Alternative Methods
In the absence of a dedicated preheat setting, users can manually set the temperature to the desired level and allow the air fryer to run for a few minutes. While this method may lack the precision of a preheat setting, it still serves the purpose of elevating the cooking experience by ensuring the appliance is adequately heated.
By understanding the importance of preheating and utilizing the available preheat settings, users can maximize the performance of their air fryers, leading to consistently delicious and well-cooked meals.
Understanding the Controls
1. TEMPERATURE SETTINGS
A. Understanding the Temperature Control
Take the time to familiarize yourself with the temperature control feature on your air fryer. This control allows you to regulate the level of heat during the cooking process, providing flexibility for various types of food. Understanding how to adjust the temperature is fundamental for achieving optimal results.
B. Customizing Cooking for Different Foods
Adjusting the temperature settings enables you to customize the cooking process based on the specific needs of different types of food. Lower temperatures are suitable for delicate items that require gentler cooking, preserving their texture and moisture. On the other hand, higher temperatures are ideal for achieving a crispy exterior, as seen in dishes like fries and other similar items.
C. Optimal Temperature Selection
Learn to choose the optimal temperature for each dish. Refer to recipes or general guidelines to determine the best temperature range for the food you are preparing. This ensures that your air fryer operates at the right heat level, contributing to the overall success of your culinary creations.
2. TIMER SETTINGS
A. Importance of Timer Function
The timer function is a crucial aspect of your air fryer controls. It allows you to set a specific cooking duration for each dish, ensuring that your food is not overcooked. Proper use of the timer function contributes to consistent and delicious results by preventing the risk of burning or drying out your meals.
B. Setting the Timer According to Recommendations
When using the timer function, follow recommended cooking times for the dish you are preparing. These recommendations can be found in recipes or guidelines provided by the air fryer manufacturer. Setting the timer appropriately ensures that your food is cooked to perfection without the need for constant monitoring.
C. Ensuring Consistent Results
By adhering to the recommended cooking times through the timer function, you create a consistent cooking environment. Consistency is key to achieving the desired taste and texture in your meals, making the timer setting an invaluable tool in the cooking process.
Understanding and mastering the TEMPERATURE and TIMER SETTINGS of your air fryer empower you to have precise control over the cooking process, resulting in delicious, well-cooked dishes tailored to the specific requirements of each food item.
Choosing the Right Cooking Oil
1. USE QUICKFRYER’S RECOMMENDED OILS
A. Optimal Oil Selection
When choosing cooking oil for your air fryer, it’s essential to follow the recommendations provided by your specific appliance, such as the Quickfryer. Selecting the right oil contributes not only to optimal cooking results but also to the overall healthiness of your meals.
B. High Smoke Points
Quickfryer recommends using oils with high smoke points, such as canola, peanut, or avocado oil. Oils with high smoke points are suitable for air frying as they can withstand the elevated temperatures without breaking down, ensuring that your food cooks evenly and without generating excessive smoke or undesirable flavors.
C. Balancing Health Benefits
Choosing oils with high smoke points not only enhances the cooking process but also balances health benefits. These oils are often lower in saturated fats and provide a source of healthy monounsaturated or polyunsaturated fats, contributing to a healthier overall cooking experience.
2. APPLY OIL SPARINGLY
A. Advantages of Minimal Oil Usage
One of the key advantages of air frying is the ability to achieve crispy and delicious results with significantly less oil compared to traditional frying methods. Applying oil sparingly helps reduce the overall calorie content of your dishes while still maintaining the desired texture and flavor.
B. Thin Layer Application
To enhance crispiness without compromising on flavor, apply a thin layer of oil to the surface of your food. This method ensures that the oil is distributed evenly, promoting an even browning effect. Using a cooking spray is another convenient way to achieve a light and consistent oil coating.
C. Maintaining Health Consciousness
By applying oil sparingly, you can enjoy the benefits of air frying while maintaining a health-conscious approach to cooking. This method aligns with the desire for flavorful meals without an excess of added fats, making air frying a preferred choice for those looking to balance taste and health.
Choosing the right cooking oil and applying it sparingly in your air fryer not only enhances the flavor and texture of your dishes but also aligns with health-conscious cooking practices. Following the recommendations of your air fryer manufacturer, such as Quickfryer, ensures that you optimize the cooking process for both culinary excellence and well-being.
Loading the Basket
1. ARRANGE FOOD EVENLY
A. Importance of Even Arrangement
When loading your air fryer basket, it’s crucial to arrange the food items evenly. This ensures that each piece receives equal exposure to the circulating hot air, promoting uniform cooking. Even arrangement is essential for achieving consistent results in terms of both texture and taste.
B. Avoid Overcrowding
Overcrowding the air fryer basket should be avoided. Placing too many items at once can hinder proper air circulation, leading to uneven cooking. Each piece of food needs sufficient space to allow the hot air to reach all sides, ensuring that every part of the dish cooks properly.
C. Consider Cooking in Batches
If you have a large quantity of food to cook, consider preparing it in batches. Cooking in smaller batches allows for better air circulation around each piece, preventing overcrowding issues. While this may take a bit more time, the end result is worth it in terms of quality and consistency.
2. SHAKE OR FLIP DURING COOKING
A. Enhancing Crispiness
To achieve an even and crispy texture, it’s advisable to shake or flip your food halfway through the cooking process. This simple step helps ensure that all sides of the food receive equal exposure to the circulating hot air. Flipping or shaking prevents one side from becoming overly crispy while the other remains undercooked.
B. Equal Exposure to Hot Air
Shaking or flipping the food allows for equal exposure to the hot air, promoting uniform cooking. This is particularly important for items that may have irregular shapes or sizes. By actively managing the cooking process, you contribute to achieving the desired level of crispiness on all sides.
C. Maintaining Consistency
Incorporating the practice of shaking or flipping during cooking is a simple yet effective way to maintain consistency in your air-fried dishes. This technique is especially useful for foods that require an even golden-brown exterior, such as fries, chicken wings, or other breaded items.
Properly loading the air fryer basket by arranging food evenly and implementing techniques like shaking or flipping during cooking ensures that you achieve the best possible results in terms of texture, flavor, and overall cooking consistency. These practices contribute to the success of your air frying endeavors.
Experimenting with Recipes
1. START WITH SIMPLE DISHES
A. Introduction to Air Frying
For individuals new to air frying, it’s advisable to start with simple recipes. This approach allows you to become familiar with the basic functionalities of the appliance and gain confidence in using it effectively. Simple dishes serve as an excellent introduction, laying the foundation for more complex culinary experiments.
B. Beginner-Friendly Options
Opt for straightforward recipes such as French fries, chicken wings, or vegetable sticks. These dishes are beginner-friendly, requiring minimal preparation and providing a clear understanding of how the air fryer cooks different types of foods. Starting with uncomplicated recipes ensures a smoother learning curve.
C. Gradual Skill Development
Starting with simple dishes enables gradual skill development. As you become more accustomed to the air fryer’s operation and nuances, you’ll feel more confident in experimenting with a broader range of recipes and culinary techniques.
2. CHECK QUICKFRYER’S RECIPE SECTION
A. Resource for Recipe Inspiration
For a wealth of recipe inspiration tailored to your air fryer, explore the dedicated recipe section on the Quickfryer website. This resource serves as a valuable source of ideas, providing a diverse array of dishes specifically designed for air frying.
B. Variety of Dishes
Quickfryer’s recipe section offers a variety of dishes, from appetizers to main courses and desserts. This variety allows you to experiment with different flavors and cooking techniques, expanding your culinary repertoire with the guidance of tried-and-true recipes.
C. Step-by-Step Instructions and Expert Tips
Each recipe on Quickfryer’s website comes with detailed, step-by-step instructions and expert tips. This ensures that even if you are trying a new and complex recipe, you have the guidance needed for successful execution. The combination of clear instructions and expert tips enhances your cooking experience.
Experimenting with recipes becomes an enjoyable and educational process when starting with simple dishes and utilizing resources like Quickfryer’s recipe section. These practices not only build your confidence as an air fryer user but also open the door to a world of flavorful possibilities in your culinary adventures.
Safety Tips
1. READ THE MANUAL
A. Unique Features and Guidelines
Every air fryer comes with a user manual providing crucial information about the appliance’s unique features and safety guidelines. Reading the manual is the first and most fundamental step to ensure a safe cooking experience. Each brand and model may have specific instructions that users need to be aware of to prevent accidents or damage to the appliance.
B. Understanding Safety Instructions
The user manual typically includes safety instructions that cover aspects such as temperature limits, recommended usage, and maintenance guidelines. By thoroughly understanding these instructions, users can operate the air fryer safely and optimize its performance.
C. Crucial for New Users
For new users, reading the manual is especially crucial. It provides valuable insights into the proper setup, operation, and maintenance of the air fryer. Neglecting to read the manual may result in misunderstandings or misuse of the appliance, potentially compromising safety.
2. PLACE ON A STABLE SURFACE
A. Preventing Accidents
Positioning your air fryer on a flat and stable surface is essential for preventing accidents. A stable surface ensures that the appliance remains secure during operation, reducing the risk of it tipping over or being displaced accidentally.
B. Space for Ventilation and Heat Dispersion
Allowing sufficient space around the air fryer is equally important. This space facilitates proper ventilation and heat dispersion, preventing overheating and ensuring the appliance operates efficiently. Placing the air fryer in a well-ventilated area enhances its overall safety.
C. Considerations for Placement
Consider the surroundings when placing the air fryer. Avoid positioning it near flammable materials or in areas with restricted airflow. Following these placement considerations contributes to a safe cooking environment.
3. MONITOR COOKING PROCESS
A. Ongoing Supervision
Despite the safety features of air fryers, periodic monitoring of the cooking process is essential. Ongoing supervision allows users to ensure that everything is progressing as expected, with no unexpected issues or malfunctions.
B. Making Timely Adjustments
Regular checks during the cooking process enable users to make timely adjustments if needed. This may include adjusting temperature settings, shaking the basket, or ensuring that the food is cooking evenly. Proactive monitoring contributes to the prevention of potential problems.
C. Safety Assurance
While air fryers are designed with safety in mind, user supervision adds an extra layer of assurance. Being attentive to the cooking process ensures that any anomalies or irregularities can be addressed promptly, enhancing the overall safety of using the air fryer.
Prioritizing safety through actions such as reading the manual, placing the air fryer on a stable surface, and actively monitoring the cooking process ensures a secure and enjoyable experience with this kitchen appliance.
Cleaning and Maintenance
1. COOL DOWN BEFORE CLEANING
A. Preventing Burns and Damage
Allowing the air fryer to cool down before cleaning is essential for safety. This step prevents the risk of burns and ensures that the components are at a safe temperature for handling. Cleaning a cooled-down appliance also reduces the likelihood of damage to sensitive parts.
B. Removing Basket and Tray
Once the air fryer has cooled, remove the basket and tray for cleaning. This step facilitates thorough cleaning and prevents any food residues from sticking to the surfaces over time. Check your user manual for specific instructions on how to detach and clean these components properly.
C. Dishwasher Safe Components
Many air fryer parts, such as the basket and tray, are often dishwasher safe. Refer to your user manual for guidance on which parts can be safely cleaned in the dishwasher. This streamlines the cleaning process and ensures that components are properly sanitized.
2. WIPE EXTERIOR SURFACES
A. Maintaining Appliance Appearance
Wiping down the exterior surfaces of your air fryer is a simple yet effective maintenance practice. This helps maintain the appliance’s appearance by removing any grease, fingerprints, or food splatters that may accumulate during the cooking process.
B. Ready for the Next Cooking Session
Cleaning the exterior surfaces ensures that your air fryer is ready for the next cooking session. A clean exterior not only contributes to a tidy kitchen but also prevents any debris from interfering with the proper functioning of the appliance.
C. Using a Damp Cloth
Use a damp cloth for wiping down the exterior surfaces. This method is sufficient for removing most surface residues without the need for harsh cleaning agents. Avoid using abrasive materials that may scratch or damage the appliance’s finish.
General Tips for Cleaning and Maintenance
A. Regular Maintenance Routine
Incorporate cleaning and maintenance into your regular kitchen routine. Regular upkeep ensures that the air fryer performs optimally and extends its lifespan.
B. Check User Manual
Always refer to the user manual for specific cleaning instructions and recommendations. This ensures that you follow the manufacturer’s guidelines for maintaining the appliance.
C. Inspect for Wear and Tear
Periodically inspect your air fryer for any signs of wear and tear. Addressing issues promptly can prevent further damage and maintain the appliance’s functionality.
By following these cleaning and maintenance practices, you not only ensure the longevity of your air fryer but also promote a hygienic and efficient cooking experience.
FAQs: How to Use Your Air Fryer for the First Time
What to do before using the air fryer for the first time?
Before using your air fryer for the first time, make sure to read the user manual to understand its features and safety guidelines. Clean the removable components, such as the basket and tray, with warm soapy water, and consider seasoning the air fryer by running it empty with a little oil to eliminate any residual odors.
What cannot be cooked in an air fryer?
While air fryers are versatile, avoid cooking items with wet batters, foods covered in heavy sauces, and raw vegetables with high water content, as they may not perform well or crisp up properly.
Can you put aluminum foil in an air fryer?
Yes, you can use aluminum foil in an air fryer. Place it in a way that doesn’t block air vents, avoid covering the entire basket, and consider poking holes if used in the bottom to ensure proper air circulation.
What is the 20 20 rules for air fryers?
The 20 20 rule suggests checking and shaking or flipping the food every 20 minutes during the cooking process to ensure even cooking and achieve a crispy texture on all sides.
Can I leave the house with the air fryer on?
It is generally not recommended to leave the house with the air fryer on. It’s safer to be present during the cooking process to monitor for any unexpected issues. If you must leave, turn off the air fryer to prevent potential hazards.
Conclusion
Congratulations! You’ve successfully navigated your first air frying experience. With Quickfryer as your guide, you’re now equipped to create a variety of delicious and healthy meals using your new kitchen companion. Remember to explore the diverse recipes on our website to elevate your air frying journey. Happy cooking with Quickfryer!